| « PREV. PAGE | Volume XII, Issue 6 | June 9, 2010 | NEXT PAGE » |

Somebody’s got to do it…
Hi everyone and welcome back! You know what? I’ve discovered a few things in the last months that have changed the way I look at life in general. First thing was that I have had way too much stress in my life for far too long. I found myself fretting over every little seemingly insignificant (to most people) problem on a daily basis and it really ruined my attitude.
I just recently realized that I haven’t written an article in nearly six months! Most of the business and personal “issues” are dealt with and I am under strict orders from my now 3-year-old son Michael to, and I quote, “fix the race car so we can go do burnouts!” What a kid! I am so lucky to have such a wonderful wife, Amy, and Michael that both want to get back to racing and have some damn fun for once.
I also realized that no matter how hard I try I can’t fix everything. For someone like me that is a hard realization to accept. I’m a “fixer”. It’s what I do. Life is too short people. Do something fun while you can. The bills and drama will always be there when you get back. So, armed with a fresh new attitude lets get back to the ‘taters!
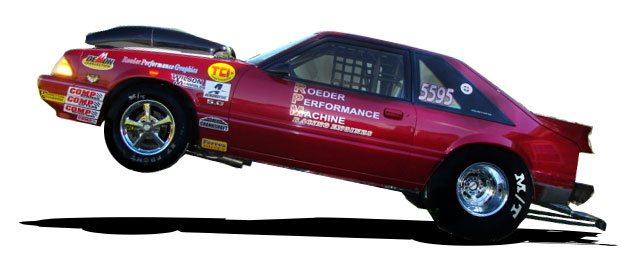
In the last article, I showed you how I cut the hole in my spanking new HO Fibertrends hood and positioned and fitted the big ol’ hood scoop onto it. I still need to finish fiber glassing it on permanently and I will show that later.
What I have spent my time on is more of the miscellaneous stuff such as finish welding the rest of the roll cage, cleaning up some of the “boogers” (ahem) around the aforementioned welds, cleaning and de-greasing, and generally getting things ready for paint and coatings. As the article title says, “Somebody’s got to do it.” And I guess that is me. This is the part of every project that I despise. It’s really not much fun and it isn’t a new challenge. It’s just work.
 This is what the driver side cross member looked like after I removed a section to gain more clearance for the Hedman Hedders I made from a kit.
As the pics will show I have also mounted the bracket for my Moroso switch panel (#74190) and I positioned it on the front hallow in the middle of the car. I sat in the driver’s seat and made vroom-vroom noises and that seemed the place to mount it. It simply welds or clamps onto the bar. I welded it into position. Once the wiring begins the main cover plate simply attaches with a couple of quick fasteners. Pretty slick and easy to get to if needed.
 |
Project Muscrate: Somebody's got to do it ... Volume XII, Issue 6 - June 9, 2010 - Page 1 of 5 |
 |

| PREV. STORY: FIA/UEM European Drag Racing Championships, The Main Event, Santa Pod Raceway, England | NEXT STORY: Tech Q&A |
| Join our party online! | ||||
|
|