Time is my biggest enemy right now.
Getting product this time of the year
seems slower than normal and getting machine
work scheduled takes a while because the
shops are all busy. DRO Editor, Jeff Burk,
is in charge of the engine so I am focusing
on the car.
I got the stock dash cut out the other
night and took some measurements and made
a simple dash panel from .040 aluminum.
The aluminum I used typically is used
to make aluminum stock car bodies and
is available from Performance Bodies in
Cedar Falls, IA (800) 722-4641. They can
ship it UPS and it comes with one side
painted white and the other side is available
in 10 different colors.
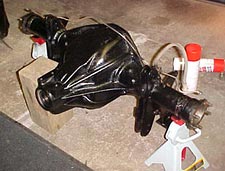
All
cleaned up and ready to be assembled.
The prior owners did a great
job of welding the four-link
brackets, shock brackets and
wheelie bar brackets to the
Dana 60 housing. I expect no
problems in this area.
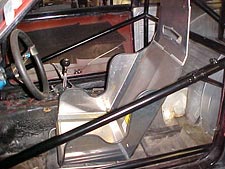
Here
is my homemade dash panel. Nothing
too fancy but it looks okay
and will hold the AutoMeter
gauges we need to monitor the
engine. I used some aluminum
1"x5" strips to hold bottom
of dash to dash bar of roll
cage and some 3/16" aluminum
rivets to attach the dash to
the remaining part of the stock
dash panel I left in place.
Here
is a view of the side bar and
rocker bar I just installed.
When you have a modified floor
or transmission tunnel the rocker
is both required and a great
safety item to protect the driver.
The
new Kirkey budget sportsman
seat is trial fitted and ready
to bolt in. Be sure to check
helmet clearance and reach to
pedals, shifter and switch panels.
Everything needs to be accessible
while you are strapped in.
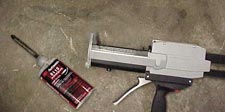
This
3M Panel Adhesive is the greatest
product I have found for bonding
panels together. It will work
on fiberglass to metal (like
my wheel open panels to metal
body), fiberglass to fiberglass
and plastic to plastics or plastics
to fiberglass. I can't imagine
a better way to mold a scoop
into a hood panel or even install
metal panels over a rust hole
in a car body. About $24.00
for a kit.
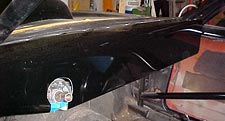
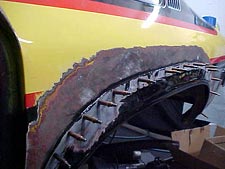
Left
side flare after 3M panel adhesive
applied and Cleco fasteners
clamping it down. You could
use screws or C-clamps to hold
a panel in place also. Four
hours later it was dry and ready
to be blended in with body filler.
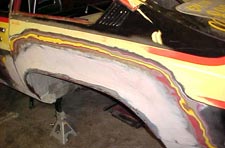
Body
filler has been sanded down
and blended in to body and the
sanding process has started.
You can see the many layers
of paint that have to be "feathered
back" to give the panel a smooth
appearance. It is not difficult
to do but it does take some
time to do it right.