|

Installment #5:
This month we update the
budget, install Lexan windows, finish the wiring
and install some fuel system parts
Words and photos by Jok Nicholson
5/7/03
We left off last month getting some suspension pieces installed and since then I have got the car back from the body shop and started putting it back together. Things like headlight doors, interior door panels, door handles, new dzus fasteners, etc. We spent about a week getting this done. Next up were the windows.
I had cut and installed Lexan windows on my trusty old '68 Dart several years
ago so I already knew what I DID NOT want to
do. I had already decided these windows would
be 3/16" Lexan. I called a local plastic distributor,
Regal Plastics, and asked if they could get
me 3/16 mar-resistant Lexan. Their answer was
"How much do you need, we stock it".
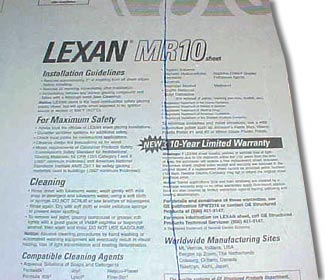 |
This
is how the Lexan MR10 arrives. Protective
covering on both sides and a crystal
clear product under the
protective covering. |
|
That was easier than I thought it would be.
I talked to the guy at Regal Plastics and we
decided on MR10 Lexan. It has a very scratch
resistant surface and can be cleaned with spray-on
Lexan cleaner and a soft cotton rag for best
results. The main thing I learned about Lexan
is if the window is very dusty, rinse it off
with water before trying to scrub the dust off
with a rag. Just use common sense; it is still
a plastic product, not glass.
Making the pattern for your windows is the
most stressful thing about Lexan windows. If
it is too small it is an expensive OOPS! I used
the old Plexiglas windows as a starting point
and traced them about 1-inch bigger all around
on some pretty stiff white poster board from
Wal-Mart. I used these templates and kept trimming
them until I was satisfied with how they fit
the openings.
Next up was the actual cutting. I used an inexpensive
variable speed saber saw and a fine tooth metal
cutting blade. I learned the last time that
a coarse blade will cut faster but the edge
ends up all chipped up and takes a lot of finishing
work with a hand file to look good. I also put
three layers of gray Racer's Tape on the bottom
of the saber saw so it would not scratch through
the protective covering that comes on the Lexan
and scratch it. Take your time as accuracy counts
and will save you hours of finishing the edges
with a hand file.
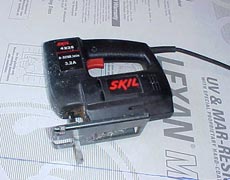
This is the variable speed saber saw I
used. Nothing special just put a few layers
of tape on the metal bottom plate and
a metal cutting blade with about 24 teeth
per inch and start cutting...very carefully.
|
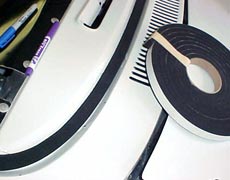
This is the AuVeCo weather stripping I
chose. It is 1/2-inch thick and 1/2-inch
wide and one side had adhesive on it.
Worked great and is readily available
at auto body supply stores. |
NEXT
PAGE >>
|